打造极致终端体验:WezTerm+Nushell+Starship 完全配置指南
告别千篇一律的黑底白字,用三款顶级工具组合,在 Windows 上构建一套媲美 macOS 的现代终端工作流。
为什么选择这套组合?
| 工具 | 特点 |
|---|---|
| WezTerm | GPU 加速渲染、跨平台、Lua 配置、原生支持 Nerd Font |
| Nushell | 结构化数据输出、内置类型系统、SQL 风格管道查询 |
| Starship | Rust 编写、毫秒级渲染、上下文感知(Git / Node / Python…) |
与传统方案的对比:
| 特性 | 本套组合 | 传统 CMD / PowerShell | WSL2 + Bash |
|---|---|---|---|
| 渲染性能 | GPU 加速,丝滑 | 一般 | 取决于宿主终端 |
| 数据处理 | 原生结构化输出 | 纯文本,需 awk/sed | 纯文本,需 awk/sed |
| 配置方式 | Lua + Nu 脚本 + TOML | 有限脚本 | Bash 脚本,繁琐 |
| 提示符定制 | Starship TOML,极丰富 | 有限 | Bash PS1,繁琐 |
| Windows 原生 | 完全原生 | 完全原生 | 虚拟化层,有损耗 |
一、前置准备
1.1 升级 PowerShell 到 7.x(强烈建议)
Windows 10 预装的是 PowerShell 5.1,基于老旧的 .NET Framework,存在 TLS 协议支持不完整、脚本兼容性差等问题,在安装 Scoop 时容易出现网络错误。请务必在安装 Scoop 之前先完成升级。
方法一:winget 安装(推荐)
1 | # 使用 Windows 自带的 winget 安装 PowerShell 7 |
方法二:官方脚本一键安装
1 | iex "& { $(irm https://aka.ms/install-powershell.ps1) } -UseMSI" |
说明: 安装后系统会同时保留 PowerShell 5.1(
powershell.exe)和 PowerShell 7(pwsh.exe),两者互不干扰。后续所有操作请统一使用pwsh执行。
提示: 若
winget提示「无法识别命令」,请先在 Microsoft Store 中搜索并安装**「应用安装程序(App Installer)」**,Windows 10 1809 及以上版本均支持。
1.2 安装 Scoop 包管理器
Scoop 是 Windows 上最优雅的命令行包管理器,类似 macOS 的 Homebrew。
自定义安装目录(强烈推荐非系统盘)
默认情况下,Scoop 会安装到 C:\Users\<用户名>\scoop。如果系统盘空间有限,可以在安装前通过环境变量自定义路径:
SCOOP:当前用户的软件安装根目录(无需管理员权限)SCOOP_GLOBAL:全局(所有用户)软件安装根目录(需要管理员权限)
1 | # ① 设置执行策略,允许脚本运行 |

安装完成后,Scoop 的目录结构为:
D:\Scoop\apps\:已安装的软件D:\Scoop\shims\:命令入口,已自动加入 PATHD:\Scoop\cache\:安装包缓存D:\Scoop\buckets\:软件源仓库
⚠️ 路径中不要包含中文、空格或特殊字符,推荐使用
D:\Scoop这样简短的纯英文路径。
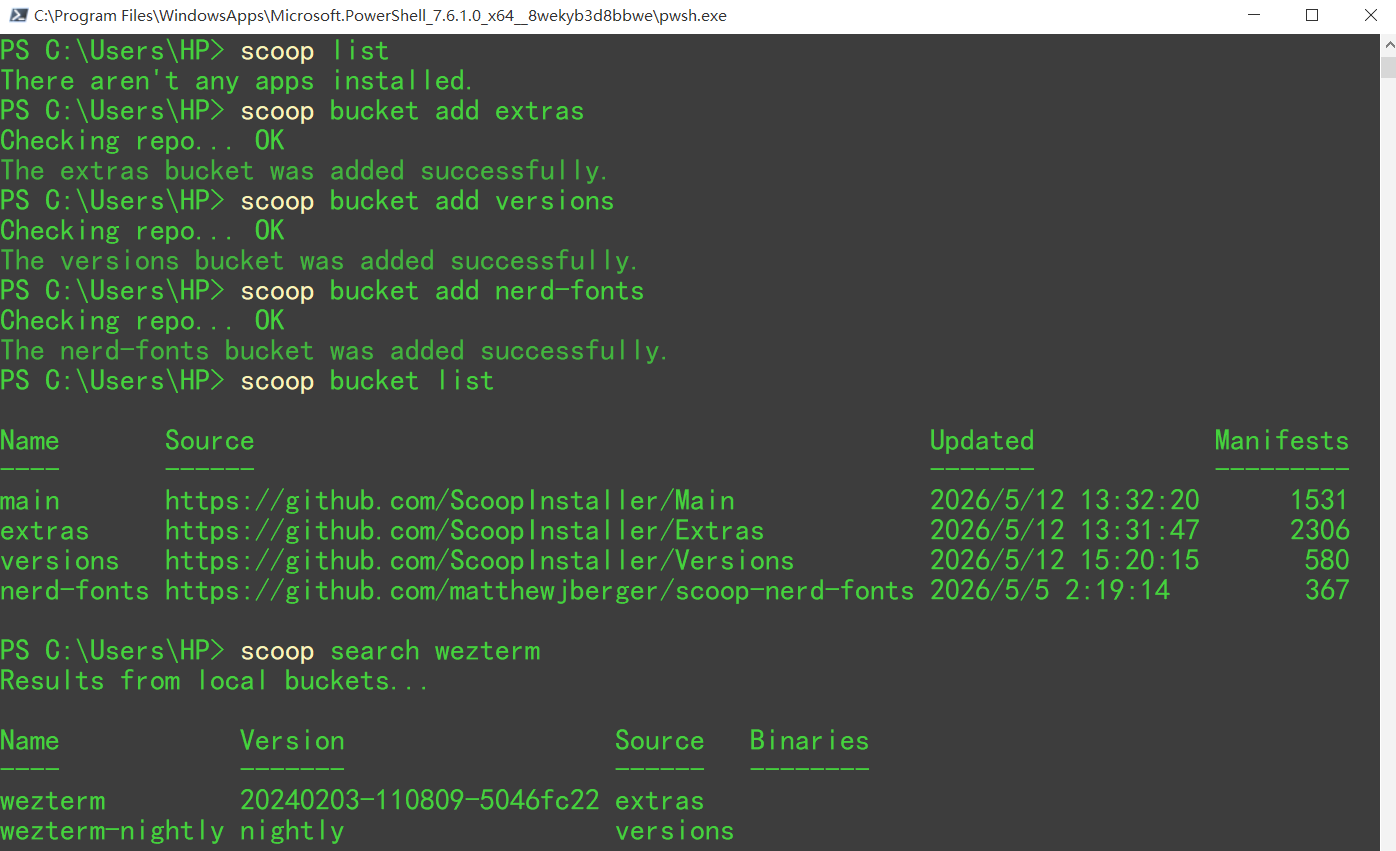
添加常用软件仓库(Buckets)
Scoop 的软件以「Bucket(桶)」为单位组织,默认只有 main 这一个核心 Bucket,软件数量有限。安装 WezTerm、Nushell、字体等工具前,需要先手动添加对应的 Bucket:
| Bucket 名称 | 用途 | 代表软件 |
|---|---|---|
main |
默认内置,无需添加 | git, curl, 7zip, aria2… |
extras |
官方扩展,覆盖绝大多数 GUI 软件 | WezTerm, VS Code, Obsidian… |
versions |
软件历史版本,用于版本锁定 | python27, nodejs-lts… |
nerd-fonts |
Nerd Font 系列字体 | JetBrainsMono-NF… |
java |
各厂商 JDK 发行版 | temurin-jdk, zulu-jdk… |
1 | # 添加日常开发必备的三个 Bucket |
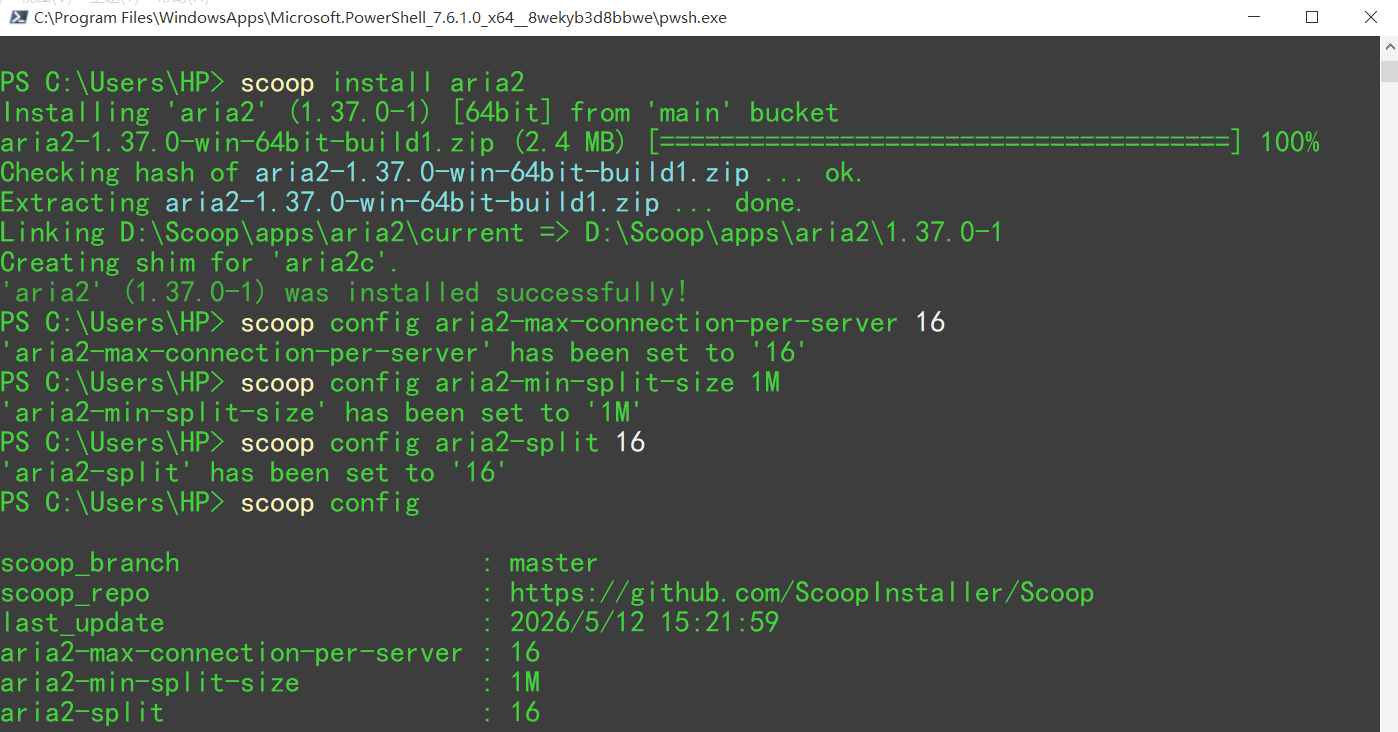
安装 Aria2 实现多线程下载加速(强烈推荐)
Scoop 默认使用单线程下载,遇到大文件时速度很慢。安装 Aria2 后,Scoop 会自动切换到多线程下载,通常可将速度提升 3~5 倍,对国内网络环境尤其友好。
1 | # 安装 Aria2(安装后 Scoop 自动启用,无需额外配置) |
💡 Aria2 安装后,后续所有的
scoop install和scoop update都会自动使用多线程,无需任何额外操作。如果某次下载报错,优先尝试scoop config aria2-enabled false后再重试,以排除 Aria2 兼容性问题。
1.3 安装 Nerd Font
Nerd Font 是 Starship 图标正常显示的必要条件。推荐 JetBrainsMono Nerd Font,字形清晰、间距舒适。
1 | # 以管理员权限安装字体(写入系统字体目录) |

⚠️ 安装字体后,若终端图标显示为方块,请重新登录 Windows 或重启系统使字体生效。
二、安装 WezTerm
WezTerm 是一款由 Rust 编写的现代终端模拟器,基于 WebGPU 渲染,支持 Lua 脚本配置,内置分屏(Panes / Tabs / Workspaces)等高级功能。
2.1 通过 Scoop 安装(推荐)
1 | scoop install extras/wezterm |
这里使用aria2下载报错:

关闭aria2后重新下载

2.2 或从官网下载
访问 wezterm.org 下载 Windows .msi 安装包,建议选择 Stable 稳定版。
2.3 配置文件路径
1 | C:\Users\<你的用户名>\.config\wezterm\wezterm.lua |
若该目录不存在,请手动创建。
在 PowerShell 中执行以下命令,一步完成目录创建和文件新建:
1 | # 创建目录 |
文件建好后,把教程第五节的完整 Lua 配置内容粘贴进去,保存即可。WezTerm 会实时监听配置文件变动,保存后自动热重载,无需重启。

三、安装 Nushell
Nushell(nu)将 shell 与结构化数据完美融合,一切输出皆为可查询的表格,告别正则表达式地狱。
3.1 通过 Scoop 安装
1 | scoop install nu |

3.2 初始化配置文件
1 | # 进入 Nushell |
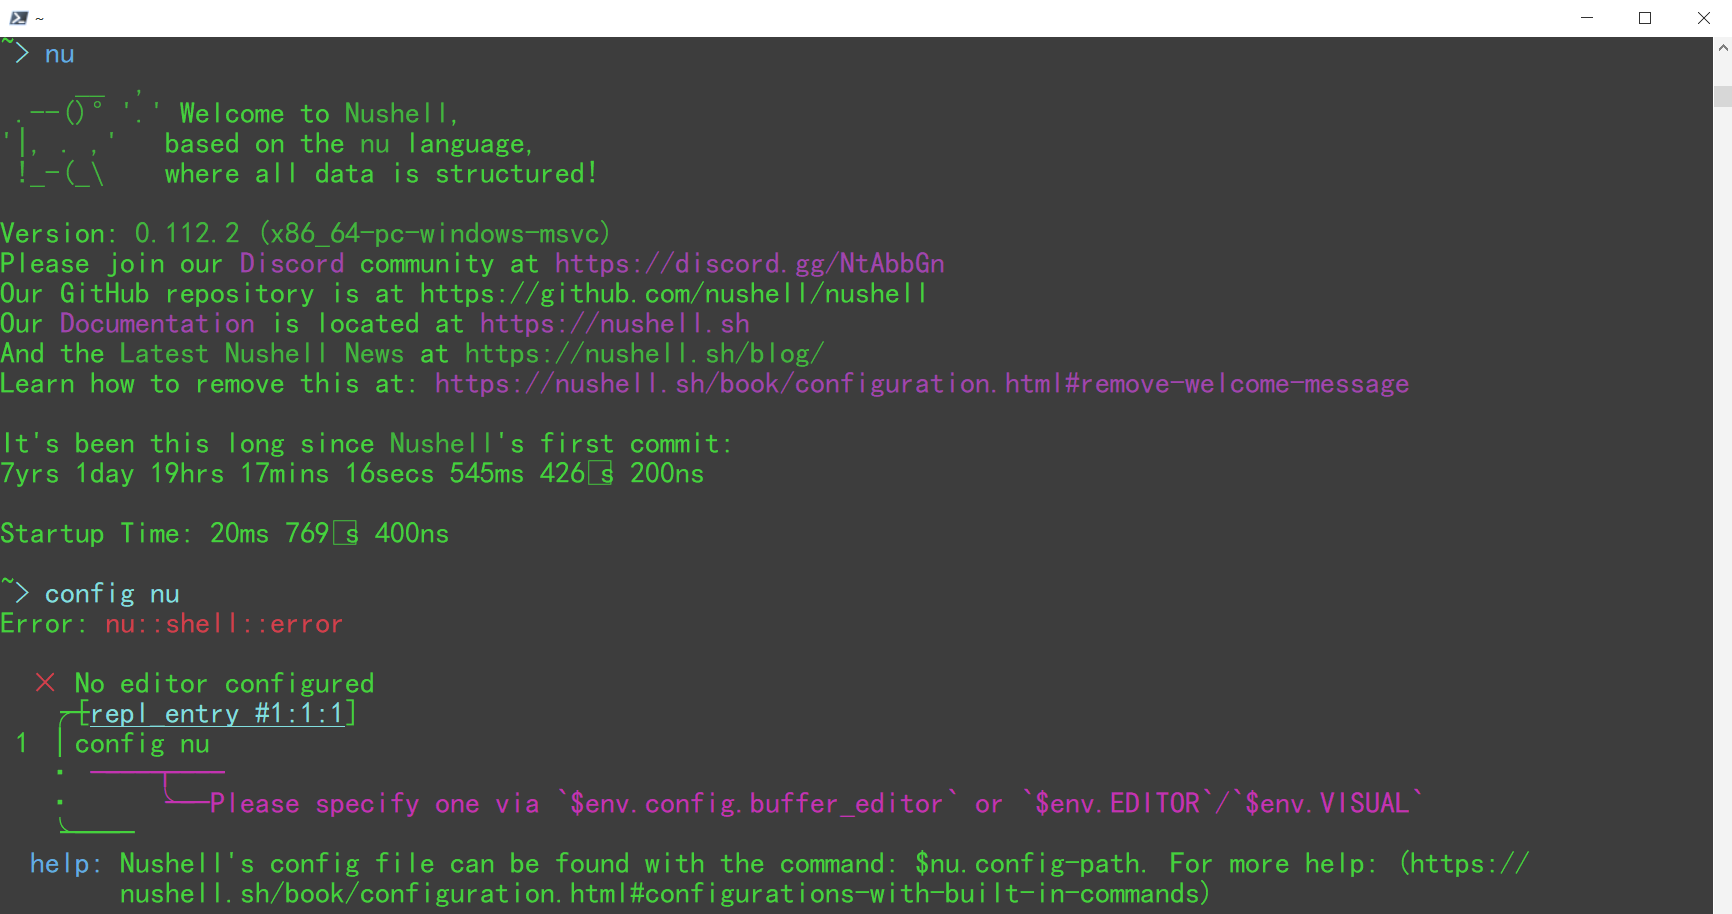
会报错因为还没有指定默认的编辑器,后面会配置。
3.3 确认 nu.exe 路径
1 | Get-Command nu | Select-Object Source |
四、安装 Starship
Starship 由 Rust 编写,毫秒级渲染,自动感知 Git、Node、Python、Docker 等上下文,高度可定制。
4.1 通过 Scoop 安装
1 | scoop install starship |

4.2 在 Nushell 中启用 Starship
编辑 env.nu,在末尾添加:
1 | mkdir ~/.cache/starship |
编辑 config.nu,在末尾添加:
1 | use ~/.cache/starship/init.nu |
4.3 创建 Starship 配置文件
1 | C:\Users\<用户名>\.config\starship.toml |
若 .config 目录不存在,请先手动创建。
五、高级配置 WezTerm
将以下内容保存到 ~/.config/wezterm/wezterm.lua:
1 | -- ╔══════════════════════════════════════════════╗ |
⚠️
win32_system_backdrop = "Acrylic"需要在 设置 → 个性化 → 颜色 中开启「透明效果」。若 WebGpu 不兼容,可改为"OpenGL"。
六、高级配置 Nushell
6.1 env.nu — 环境变量配置
路径:C:\Users\<用户名>\AppData\Roaming\nushell\env.nu
1 | # ── Starship 初始化 |
6.2 config.nu — 主配置文件
路径:C:\Users\<用户名>\AppData\Roaming\nushell\config.nu
1 | # ── 加载 Starship |
💡 推荐同时安装以下增强工具:
七、高级配置 Starship
路径:C:\Users\<用户名>\.config\starship.toml
1 | # 双行提示符布局 |
修改 Starship 配置后,在 Nushell 中执行
exec nu即可立即生效,无需重启。
八、效果验证
重新打开 WezTerm,在 Nushell 中执行以下测试:
1 | # 1. 验证结构化数据处理 |
九、常见问题
提示符图标显示为方块或问号
确保 WezTerm 配置中使用了 Nerd Font,并以管理员权限重新安装字体:
1 | scoop install --global nerd-fonts/JetBrainsMono-NF |
重装后重新登录 Windows 即可。
Scoop 安装时提示 TLS 握手失败
这是 PowerShell 5.1 的经典问题。根本解决方案是升级到 PowerShell 7。若暂时无法升级,可临时修复:
1 | # 临时启用 TLS 1.2(仅当前会话有效) |
Nushell 中 Starship 不生效
检查 env.nu 和 config.nu 末尾是否有对应配置,然后重新生成:
1 | starship init nu | save -f ~/.cache/starship/init.nu |
WezTerm 透明效果不生效
前往 设置 → 个性化 → 颜色 开启「透明效果」。若使用核显且 WebGpu 不兼容,将 front_end 改为 "OpenGL"。
某些 Bash/CMD 命令在 Nushell 中无法运行
Nushell 不是 POSIX 兼容的 shell,可临时调用其他 shell:
1 | # 临时进入 PowerShell 执行特定命令 |
快捷键速查
| 快捷键 | 功能 |
|---|---|
| `Ctrl+Shift+ | ` |
Ctrl+Shift+- |
水平分屏 |
Alt+h/j/k/l |
切换 Pane |
Ctrl+Shift+T |
新建 Tab |
Ctrl+Shift+W |
关闭 Tab |
Ctrl+= |
增大字体 |
Ctrl+- |
减小字体 |
Ctrl+Shift+F |
搜索 |
Ctrl+Shift+C |
复制 |
Ctrl+Shift+V |
粘贴 |
推荐配套工具
- zoxide:比
cd聪明 10 倍的目录跳转工具。学习你的常用路径,输入目录名的任意片段即可瞬间跳转,无需完整路径。 - bat:
cat的现代替代品。自动语法高亮、行号显示、Git 变更标记,支持分页,阅读代码文件从此赏心悦目。 - fd:
find的现代替代品。比系统find快 5~10 倍,语法简洁,默认忽略.git和.gitignore中的文件。 - ripgrep:
grep的现代替代品(rg)。基于 Rust 正则引擎,速度是 grep 的数十倍,自动忽略二进制和 gitignore 文件。 - fzf:命令行模糊查找器。可与 Nushell 历史记录、文件选择、进程列表深度集成,任何列表都能秒变交互式搜索界面。
- scoop-search:替代
scoop search的加速版本。官方scoop search会逐个扫描 bucket 极慢,此工具使用本地索引,搜索速度提升百倍。 - uv:Rust 编写的极速 Python 包管理器,完整替代
pip、venv、pyenv。安装包速度比 pip 快 10~100 倍,自动管理 Python 版本。 - Neovim:现代化 Vim,支持 LSP、Tree-sitter 语法树、Lua 配置,是终端内最强文本编辑器。配合 LazyVim 发行版可秒变轻量 IDE。
这些工具都可以通过 Scoop 一键安装,配合 Nushell 别名和 WezTerm 使用体验将大幅跃升。它们均由 Rust 或现代语言编写,性能远超传统同类工具。
1 | scoop install zoxide bat fd ripgrep fzf scoop-search neovim |